Fog-Bow
/Look at this really cool “Fog-bow” ˆ saw while out photographing shore birds yesterday. Certainly not something I ever thought I would see and be able to take a picture of.
Look at this really cool “Fog-bow” ˆ saw while out photographing shore birds yesterday. Certainly not something I ever thought I would see and be able to take a picture of.

We are going to have soooo much fun would!!


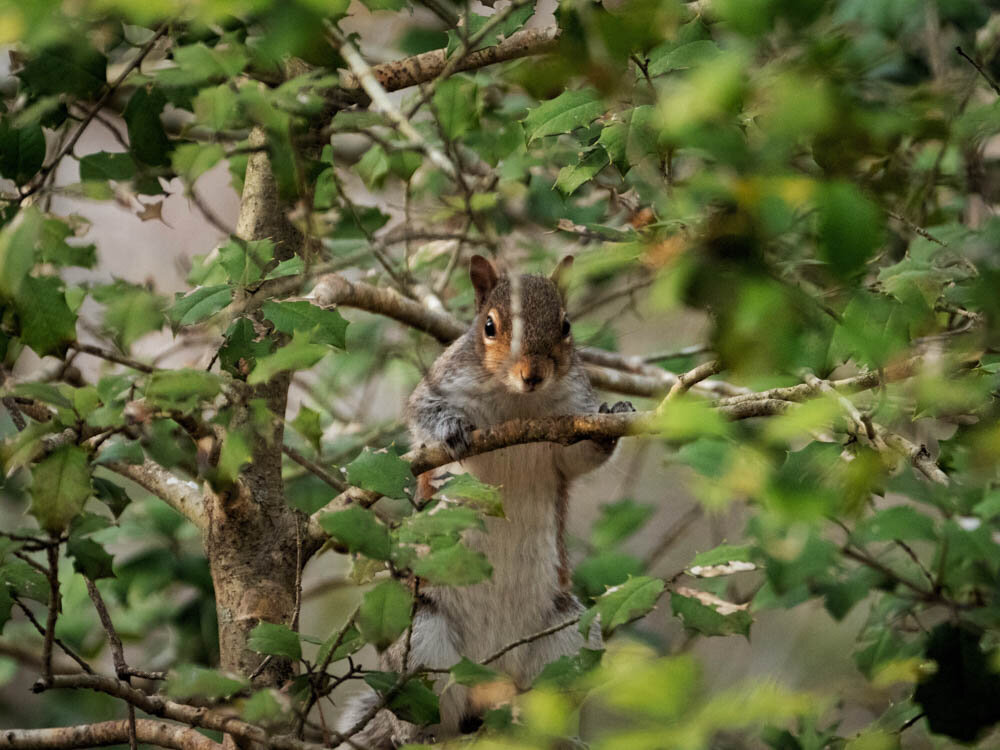
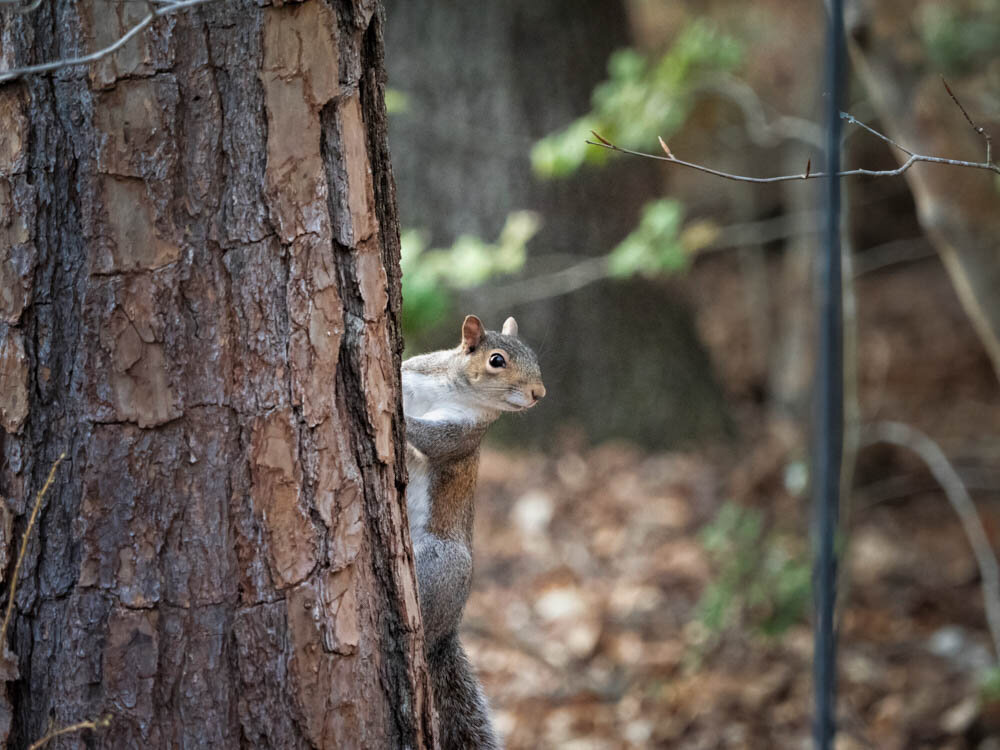
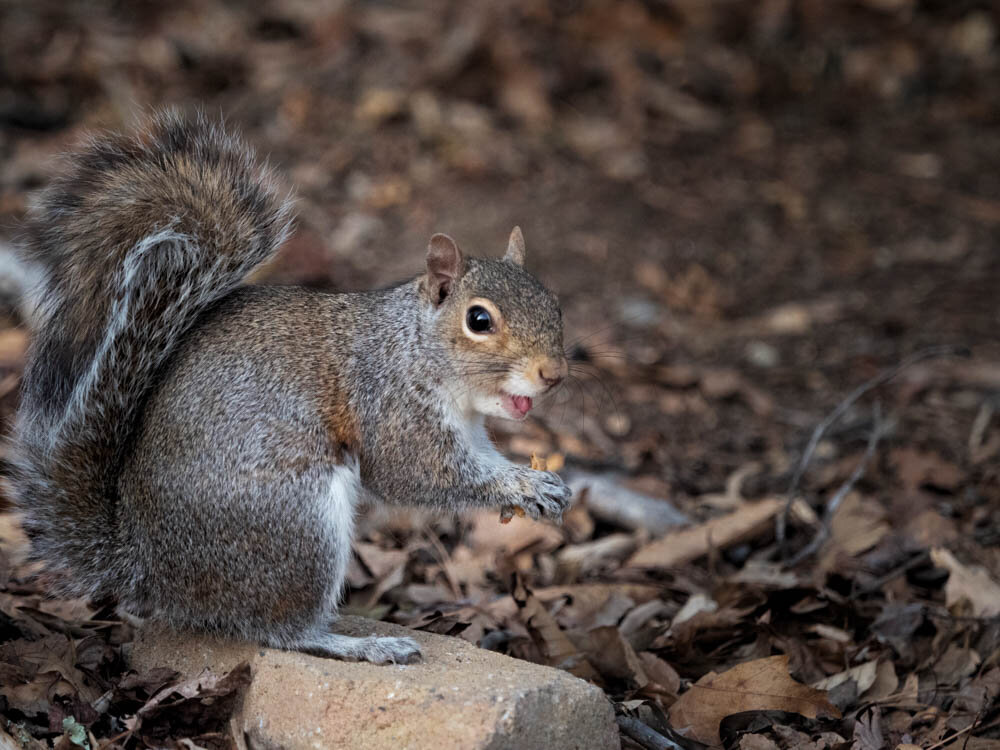
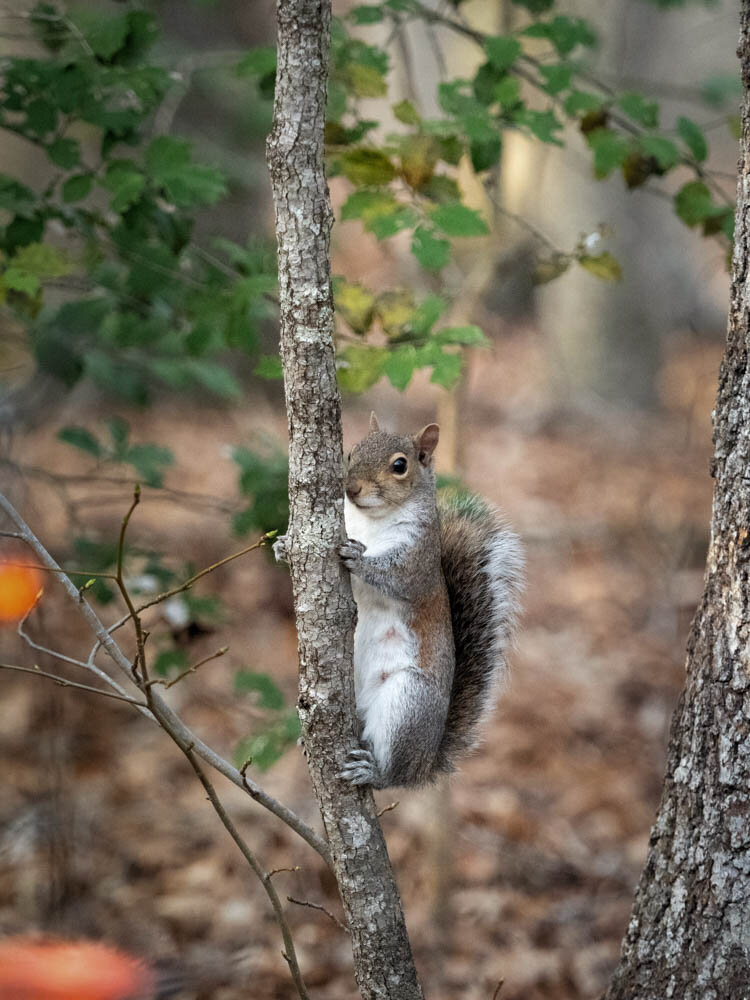
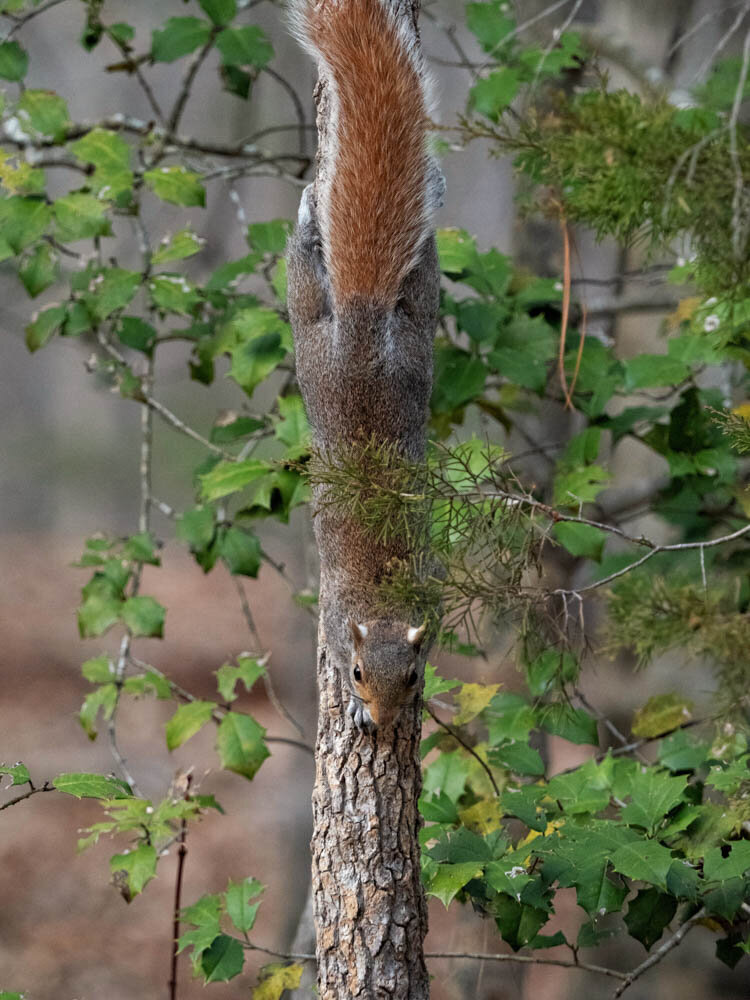
I was trying to get some shots of the yard birds earlier this week and while waiting for them to arrive some of the squirrels who live here on the bluff decided to put on a little comedy show for me. Make sure you check out Red our Red-tailed squirrel. Look how she blends into the trees so well.
I know many don't like squirrels and I do get frustrated when they empty my feeders but I do see a cuteness in them that you can't take away. You?
We have quite a bit of travel coming up over the next 18 months from short weekends camping to a two week trip to Alaska, hiking in the Smokey Mountains and a Caribbean cruise mixed in there and I really started thinking about how I can utilize the tools I already have to create a back-up/culling/editing system for my photos that does not require me to bring anything else with me besides what I would take anyway (camera, memory cards, iPad Pro).
After lots of research, some YouTube viewing and a messages back and forth to some photographer/vlogger friends I have developed my system. Is it perfect, no. I am sure others have their own methods that they think works best but after multiple trial runs I find these steps work best for me. I am sure as I learn more I will fine tune it and adapt to changes in software etc. When I do I will update my steps in this posting.
I did mention in the above paragraph I wanted to do this without carrying anything else but since the places I am going will most often have limited to no internet access available for immediate cloud back-up I will need to carry my wireless external hard drive for those critical back-ups. As most of these photos will be taken during once in a lifetime events/trips and I do not want to lose anything I may at times even carry a second external or a high capacity USB stick but I will explain that thinking at the end.
The "tool" I will carry with me include:
* Western Digital My Passport Wireless Pro external hard drive (or any
wireless portable drive)
* iPad Pro (any version will work)*
* iPad friendly card reader dongle
Apps needed on the iPad include:
* Western Digital "MyCloud" app. Free and necessary to see what's on your wireless HD
* iPad Camera Roll - comes on iPad
* Lightroom CC (if you want to send your keepers to your PC at home remotely (I do). Requires a subscription.
**2nd External hard drive (1-2 TB minimum in my opinion)
The Process :
Step one - Backing up the memory cards
Step Two - Getting photos from memory card to iPad in three steps
Step Three - Culling your photos
Step Four - Importing to Lightroom Mobile
Step Five - Bonus Step - Backing up the Back-up(s)
Step One - Back-up those cards.
I know you are in a hurry to see what you shot but you never know when the memory card you are using will crash on you so before you do anything else back-up those cards. This is actually a very easy step.
1. Make sure that you have installed the WD Wireless external drives companion app "MyCloud" onto your ipad as you will need this to see your back-ups.
2. Program the MyCloud app to do an auto import anytime a memory card is inserted into the card reader slot on the external drive. To do this:
a. Power on WD HD and connect your WD HD to your iPad wirelessly (turn on HD , go to settings wifi and select the HD).
b. Open MyCloud, click on the three line icon top left then settings, under devices pick MyPassport, scroll to bottom and pick SD Card, turn on "Copy New Items only" and "Automatic Import" by moving toggle to the right.
c. Close MyCloud.
3. Insert SD card into the card reader slot built into the WD HD and let it do its thing. You will see a row of 4 lights on the top left of the HD, as the card copies content over the lights will flash and illuminate, when all four are solid and lit the card has completed the import.
4. You can should do one of two things BEFORE you remove the card from the slot.
a. Power down the HD and then remove card.
b. If you have your iPad handy and are connected to the HD wi-fi open the MyCloud app and pick "My Passport". You will see the name of the memory card you inserted with a arrow up icon over it. Click on that and the card will be ejected and you can safely remove the card.
** If you want to look at the back-up on the WD HD open the MyCloud app (must be connected through the wi-fi) then pick My Passport/Storage/SD Cards Imports (or another folder if you have moved them manually), drill down to photos you wish to see. When you get to the photo files if you see the files with a question mark icon over them there is nothing wrong, this just means the iPad cannot read the version of raw file you are importing. You should see .jpg's with no issues.
Step Two - Getting the photos from memory card to the iPad in three steps
Once you have successfully backed the card up to the WD HD
1. Connect card reader dongle and insert memory card
2. When import screen appears and all photos appear on the top left where it says "Import To" click on that and create a new album , naming it whatever you want and then either select the photos you want to import or click "Import All" on the top right.
3. Let your iPad work its magic. When it is done the card auto ejects from the dongle. It will as you what to do with the photos on the memory card. It is up to you if you keep or erase. I always keep and let my camera erase them using the erase card/ format card function of the camera. I have never had a memory card fail since I started this process.
Step Three - Culling the photos (marking the keepers) on the iPad
This is clumsy I admit but Apple doesn't make things easy sometimes. It is a fast process though, much faster than on a PC version of Lightroom or other software.
a. Open the camera roll album that you created when importing from card
b. Open photos full screen and mark those that are keepers by using the "favorite heart: on the top right of your screen.
c. When done and if you have space on the iPad you can keep the non-keepers on your iPad as long as you want, I delete them right away as it makes the next steps cleaner for me, I already have decided they are of no use to me and because if I ever were to need one I have as a back-up on my WD HD
d. If you saved many to the favorites folder you can if you want recall those you saved and see if you have second thoughts on any of them before you move them into LR and eventually your home PC/final photo storage location.
**I have become super picky about what I keep when I review my photos ever since I heard a photography teacher say that "it's okay to keep as many as you want but the more you save the more you have to review and edit so it's best to keep only the very best." He then asked "Do you want to spend time reviewing and editing or shooting for the best shot you can get?" That really made me think and makes it easy to get rid of the just okay ones. This though is my thought, your opinion may be different.
Step Four - Moving the keepers into Lightroom Mobile
1. Open LR Mobile on the iPad
2. Click on the three dots on the top right and choose Add Photos/From Camera Roll
3. When camera roll opens in top center is a drop down, choose this and go to the folder you created when you imported to the ipad from your memory card.
4. Select all photos to add (three dots top right/select all) then Add photos (buttom bottom center)
5. The photos, once import is complete are located under the All Photos tab and will auto sync to your Lightroom CC account and to your home computer* via sync with LR CC.
I prefer to have my imports in collections (why does LR Mobile call them albums but LR CC calls them collections?). To get them into a collection/album go to All photos and select all the recent imports using the select option under the three dots on top right. The bottom of screen it says "Add To" select this, create a new Album and click add.
**If you are backing your photos to your PC/Mac at home via the auto sync function you will find them in a collection called Import from iPad. By default the photos are downloaded to your "my pictures folder". You can change where ever you want them to be stored and direct the dialog rule to this folder instead. I store all my photos on a external drive so this is where my dialog box points. I called the folder iPad Mobile imports and once I have get home and can sit in front of my PC version of LR I will drag them to the appropriate folder for final storage.
Step Five - Bonus Step - Backing up the Back-ups
This is not a step everyone has to take, and not necessarily a step I will take for all trips but certainly for my 7+ day trips when I will need to reuse my memory cards because my cards are expensive (I need the super high speed ones for wildlife captures) and I don't want to carry 20 of them with me :). There are new, very small portable hard drives out there for very little money so for me this is a easy, no brainer so I can rest easy knowing that if my WD HD crashes on me while traveling my photo memories aren't gone with it.
To back-up a WD HD Wireless HD you:
a. Power up the WD HD and connect the wi-fi to Your iPad
b. Open the My Cloud App/MyPassport/
c. Plug in a USB External Drive OR USB stick if its large enough)
d. Go to SD Cards Import and you will see a folder which contains your photos, click on the three dots on top right and select all
e. Click copy/My Passport
You will then see your 2nd external device/USB Stick listed, click on that then choose paste in bottom right. This step does NOT give you the top row left of flashing lights as an indicator that the copy is complete. I simply let it do what it is doing for 5-10 minutes, longer if there are multiple folders copying over. Great time to do this as you get ready for bed or in the morning while getting ready to leave. You can power down hard drive then power up to see what is loaded on the external drive.

Winter Swamp just waiting for spring....just like the rest of us.

The purple finch is not native to our area and so I was lucky to grab this photo of such a beautiful female as she rested at our feeders. I am assuming she has started her migration home..
You can see more of my photography by visiting the link above. Hope you stop by and let me know what you think.

Categories
Archives
Latest on Instagram….

All images posted on and attributed to Kelly Reynolds, Life on the Bluff, Life on the Bluff Bird’s Nest have been created by and are the sole property of Kelly M. Reynolds
and copyrighted in the year published, unless otherwise noted.
My images are copyright protected under international copyright laws.
It is not permitted to copy, download, distribute in public, or reproduce my images in any way whatsoever without my written consent. © 2024
Confirmed statement: 2015, 2016, 2017, 2018, 2019, 2020, 2021, 2022, 2023, 2024